Affiliate disclosure: This article contains affiliate links. We may earn a commission if you purchase through them, at no extra cost to you.
Key takeaways
- A router table holds a router upside down beneath a flat surface, with the bit facing upward; you move the wood across the tool rather than the tool across the wood, which gives more stability and consistency than freehand routing (A House in the Hills).
- Feed direction matters: on a router table, feed the workpiece from right to left against the fence, so the bit rotation pulls the wood toward the fence rather than grabbing it.
- Squaring the fence and setting bit height before every session are the two adjustments that most affect cut quality.
- Take shallow passes. Cutting a deep profile in one go causes tear-out and kickback; several light passes are safer and cleaner.
- Use featherboards, push blocks and eye protection. A router bit spinning at up to 22,000 RPM demands respect (Wonderful Woodworking).
What is a router table and why should beginners learn it?
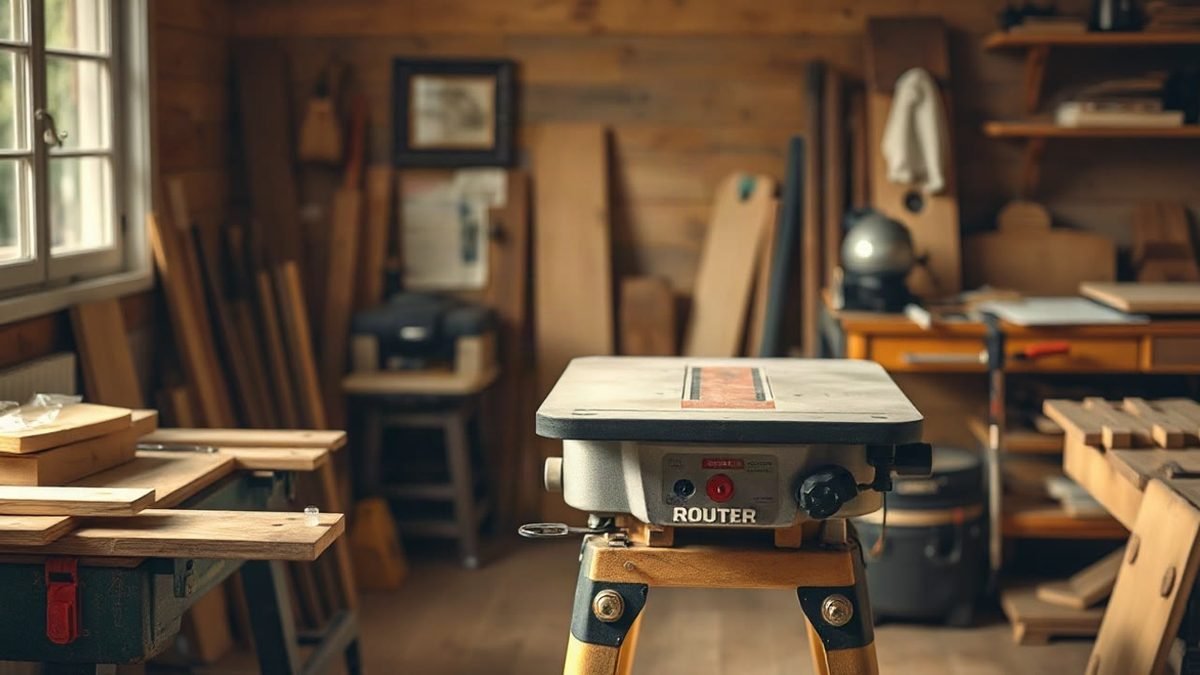
A router table is a stationary woodworking tool that holds a router upside down beneath a flat table surface, with the bit facing upward. If you are learning how to use a router table, understanding this one idea is the perfect place to start: with a handheld router you move the tool across the wood, but with a router table you move the wood across the tool (A House in the Hills).
The router itself is arguably the most versatile tool in the shop, capable of cutting decorative profiles, trimming flush edges, cutting dadoes and shaping edges. But it spins at up to 22,000 RPM, and that demands respect (Wonderful Woodworking). Mounting it in a table gives you more control, precision and consistency than working freehand, and it is generally safer for many operations when used correctly, because both hands stay on the workpiece and the bit position never changes.
That stability is exactly why many woodworkers recommend the router table as the first way beginners learn routing. It builds good habits early and produces professional-looking results on edges, grooves and joints (A House in the Hills).
What can you do with a router table?
A router table covers most of the common routing jobs in a small workshop:
- Edge profiling: roundovers, chamfers, ogees and other decorative profiles on edges and mouldings.
- Grooves and dadoes: straight cuts across or along a board for joinery, shelves and drawer bottoms.
- Flush trimming: trimming lipping, veneer or inlay level with the surrounding surface using a flush-trim bit.
- Rabbets: stepped cuts along edges for backs, lids and glazing.
- Template work: duplicating a shape from an MDF or plywood pattern, often with the help of a guide collar or template bushing fitted to the router (Wonderful Woodworking).
A handheld router can be used without a router table, and there will always be jobs that suit it better, such as working on large assembled pieces. But for repeatability on smaller parts, there are times when a router table is quicker, easier and safer (Saws on Skates).
Setting up a router table for the first time
Mount the router securely
Most router tables accept a fixed-base or plunge router bolted to an insert plate beneath the tabletop. Bolt the router through its base screw holes onto the plate, drop the plate into the opening and level the plate with the table surface using the adjusting screws. A plate that sits proud of the surface can make it harder to keep the workpiece flat and steady as it passes the bit.
Choose and fit the right bit
Use carbide-tipped bits matched to your profile. A sensible starter set includes roundover, cove, straight cut and flush-trim bits (Wonderful Woodworking). Always unplug the router before changing a bit, insert the shank as deeply as the collet allows, in line with the manufacturer’s instructions, tighten it firmly, then raise the bit to your working height. Installing the bit high in the collet risks the collet clamping on a shallow section of shank, which can let the bit work loose.
Set the bit height
Set the bit so a shallow portion of the cutting edges will engage the wood on the first pass. A good habit is to hold a scrap of your workpiece against the bit, lower the bit into position and mark the height, or use a height gauge. For deep profiles, plan to raise the bit slightly between passes rather than cutting everything at once.
Align and square the fence
The fence is the vertical guide the workpiece rides against, and it does most of the work of keeping cuts straight and consistent. To square the fence, place a straightedge or the fence faces together and check that both halves are perfectly parallel to the direction of travel; misaligned faces will pull or push your workpiece as it passes the bit (Saws on Skates). Lock the fence down securely once aligned, and set its halves so they just clear the bit on each side, or use a split-fence opening that can be closed in to support the wood close to the cutter.
Which direction should you feed the workpiece?
This is the single most important safety habit in a router table. The bit spins clockwise when viewed from above, so feed the workpiece from right to left as you face the table. That way the cutting action pulls the wood against the fence and holds it there.
Feeding the wrong way, from left to right, means the bit rotation tends to grab the workpiece and pull it away from the fence and toward your hands. This is how kickback happens. If you ever need to make a cut where the standard feed direction would be awkward, stop and reconsider the setup rather than pushing through against the rotation.
Feed at a steady, moderate pace: slow enough that the bit shears the fibres cleanly, fast enough that it does not scorch or burn the wood. Let the cutter do the work; forcing the stock forward overloads the motor and invites tear-out.
How to make your first cuts safely
Follow this sequence every time you step up to the table:
- Unplug or switch off before any adjustment. Bit changes, fence moves and height settings all happen with the router disconnected (Saws on Skates).
- Do a test cut on scrap. Use offcuts of the same species and thickness as your project piece to dial in height and feed rate before touching the real work.
- Support the workpiece. Use featherboards above and in front of the bit to hold the stock down and against the fence. For narrow pieces, use push blocks or push sticks so your fingers never pass near the bit.
- Take shallow passes. Raise the bit in small increments across two or three passes rather than forcing a full-depth cut in one go.
- Avoid leaning directly over the bit while cutting, and keep your body clear of the cutter.
- Let the bit stop before walking away. Never reach near the bit while it is still spinning, and clear offcuts with a stick, never your hand.
Wear eye protection every time. A router bit at 22,000 RPM can throw chips with real force, and loose sleeves, gloves or jewellery near a spinning cutter are a serious hazard (Wonderful Woodworking).
Beginner techniques worth practising
Edge roundovers
The classic first project: soften the sharp edges of a board, shelf or tabletop. Take a light pass, flip the board and check the profile, then raise the bit slightly for the finishing pass. Consistent fence position gives consistent results.
Grooves and rabbets
With a straight bit and the fence locked, run a groove down the inside face of a panel or cut a rabbet along an edge for a cabinet back. Mark the fence position, cut a test piece and measure the distance from the edge before committing your project stock.
Using a starting pin and partial fence
For curved work such as arcs on a shaped panel, the fence is removed and a starting pin guides the entry of the work into a bearing-guided bit. Ease the stock into the bit against the pin, then pivot it into the cut. This is a more advanced technique; practise on scrap and never attempt it with small pieces that cannot be controlled.
Keeping the cut clean
Burn marks mean you are feeding too slowly; rough tear-out usually means the bit is dull, the pass is too deep or the feed is too fast. Sharp bits and shallow passes solve most cut-quality problems.
What should be in place before you switch on? A pre-cut checklist
Run through this checklist at the start of every session. It takes two minutes and prevents most common router table mistakes:
- Router unplugged before any bit or fence change was made, and now plugged back in safely.
- Bit inserted at least three-quarters of its shank into the collet and tightened.
- Bit height set for a shallow first pass.
- Fence locked, squared and its opening no wider than needed.
- Plate level with the table surface, no lip to catch stock.
- Featherboards and push blocks within reach.
- Test scrap of the same thickness as your workpiece on hand.
- Eye protection on, no loose clothing, sleeves rolled up.
- Feed direction confirmed: right to left, against the fence.
Do you need to buy a router table, or can you build one?
Both routes are viable. Commercial router tables range from benchtop models with a simple fence to full-size cabinets with built-in lifts and dust collection. For occasional hobby use, a benchtop table plus a decent router covers most beginner needs.
Building your own is also a popular route, and ready-made DIY router table plans are widely available online; a search on Amazon.co.uk for DIY router table plans returns over 5,000 results alongside CNC options for those who want automated cutting (Amazon.co.uk). A well-built table with a flat top, a rigid split fence and a solid mounting plate can perform just as well for hobby work as a shop-bought unit, and building one is a good exercise in the very skills the table will then help you practise.
If your workshop space is tight, planning the whole bench area before buying anything is worth doing. The guide to building a simple workbench covers how to size a bench for a small UK or US workshop, and a router table is usually happier bolted to or sited alongside a solid bench than standing alone. Where space really is at a premium, small-shop layout resources such as UltimateSmallShop (affiliate link) focus on organising tools and workstations into compact spaces; it suits woodworkers fitting a shop into a garage corner, and is less relevant if you already have a dedicated workshop room.
Affiliate recommendation
Mentioned in this article: UltimateSmallShop
UltimateSmallShop is a guide to setting up a small woodworking workshop.
Read the seller’s information →
Affiliate link: we may earn a commission if you purchase, at no extra cost to you. We have not tested this product.
FAQ
Do you need a router table to use a router?
No. A handheld router works fine on its own for many tasks. But there are times when a router table is quicker, easier and safer, especially for edge work on smaller parts and for repeatable cuts (Saws on Skates).
Which way do you feed wood into a router table?
Feed from right to left as you face the table, against the direction of bit rotation, so the cut pulls the workpiece into the fence. Feeding the wrong way invites kickback.
Can you use any router in a router table?
Most fixed-base and plunge routers can be mounted, but check that the base has suitable mounting holes and that you can reach the on/off switch and height adjustment from above or beneath the table. A dedicated router-table switch or paddle stop is a worthwhile safety addition.
What router bits should a beginner buy first?
A carbide-tipped starter set of roundover, cove, straight cut and flush-trim bits covers the most common beginner profiles and joinery cuts (Wonderful Woodworking). Add specialised bits only when a project actually needs them.
How deep should each pass be?
Keep passes shallow, typically a few millimetres at a time, and raise the bit between passes. Deep single passes load the motor, cause tear-out and increase kickback risk.
Conclusion: start slow, cut clean
A router table rewards patience. Set the fence square, take shallow passes, feed right to left, and keep your hands clear of the cutter, and the tool will quickly move from intimidating to indispensable. Your first tasks are simple: mount the router, square the fence and practise roundovers on scrap until the profile comes out consistent every pass.
When you are ready to expand your skills beyond the router, understanding accurate fastening matters just as much; our guide on how to use a torque wrench properly is a natural next step for anyone fitting workshop hardware and furniture bolts.